When we started our trek across the USA, I should have anticipated that we would see things that our phone wouldn’t be able to accurately capture. Naively, I thought the technology I carried in my pocket would be enough to convey the memories and the emotions the places we visited evoked. It wasn’t until reaching the mountains of the midwest that I started to find that to be untrue. It was all too much, from the grandiose peaks of Colorado, to the red rock cliffs of Utah, down through the deserts and canyons of Nevada and Arizona. We found our phones storage filling up quick and discovered that it never quite captured the beauty of these sights. But it was on the ferry route to Alaska, that things came to a point where I realized we had to upgrade, or we would spend time regretting our mistake…
When we started our trek across the USA, I should have anticipated that we would see things that our phone wouldn’t be able to accurately capture. Naively, I thought the technology I carried in my pocket would be enough to convey the memories and the emotions the places we visited evoked. It wasn’t until reaching the mountains of the midwest that I started to find that to be untrue. It was all too much, from the grandiose peaks of Colorado, to the red rock cliffs of Utah, down through the deserts and canyons of Nevada and Arizona. We found our phones storage filling up quick and discovered that it never quite captured the beauty of these sights. But it was on the ferry route to Alaska, that things came to a point where I realized we had to upgrade, or we would spend time regretting our mistake.
Over time we have refined our gear and equipment list and are refining still, to nail down what is essential and what isn’t. To start off, we knew we wanted to capture ultra wide angles from a first person perspective, so we ordered a GoPro while on our roadtrip, to arrive in Alaska for us to use. While in Alaska the GoPro helped out enough with capturing video and time-lapse footage, but we dreamt bigger. We found that it was hard to just capture things with a ground perspective so we looked to the skies for our next equipment.
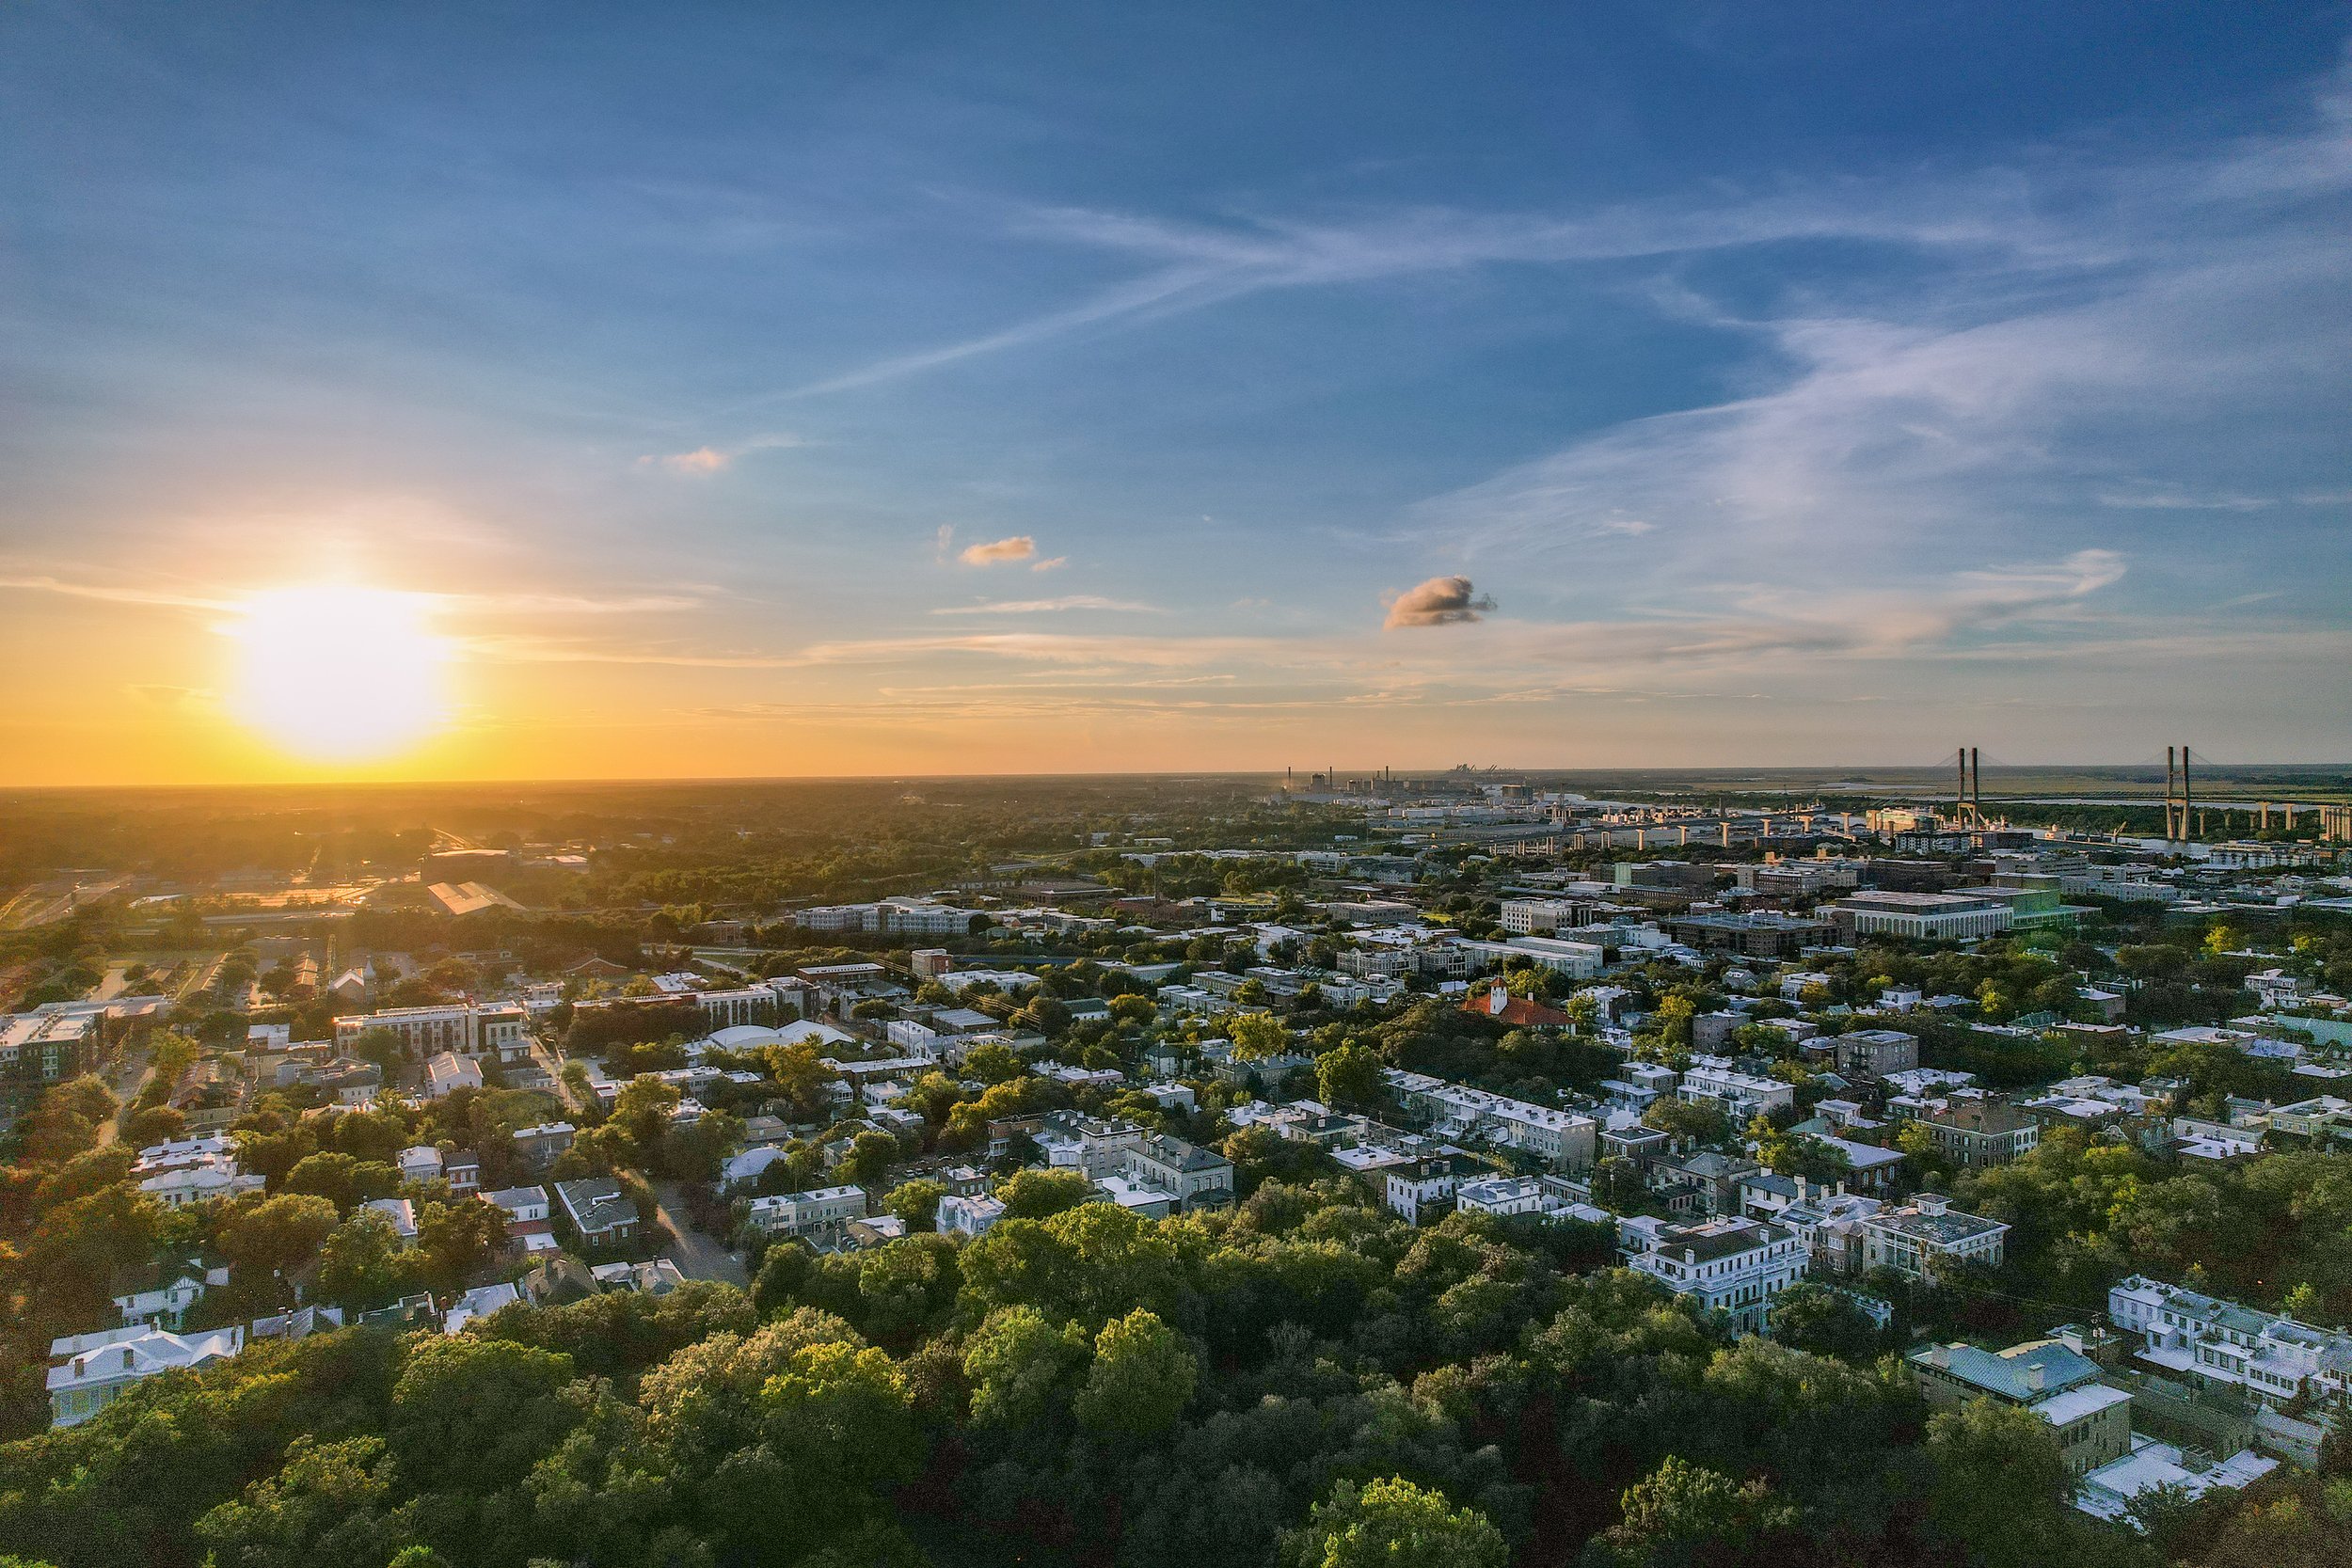
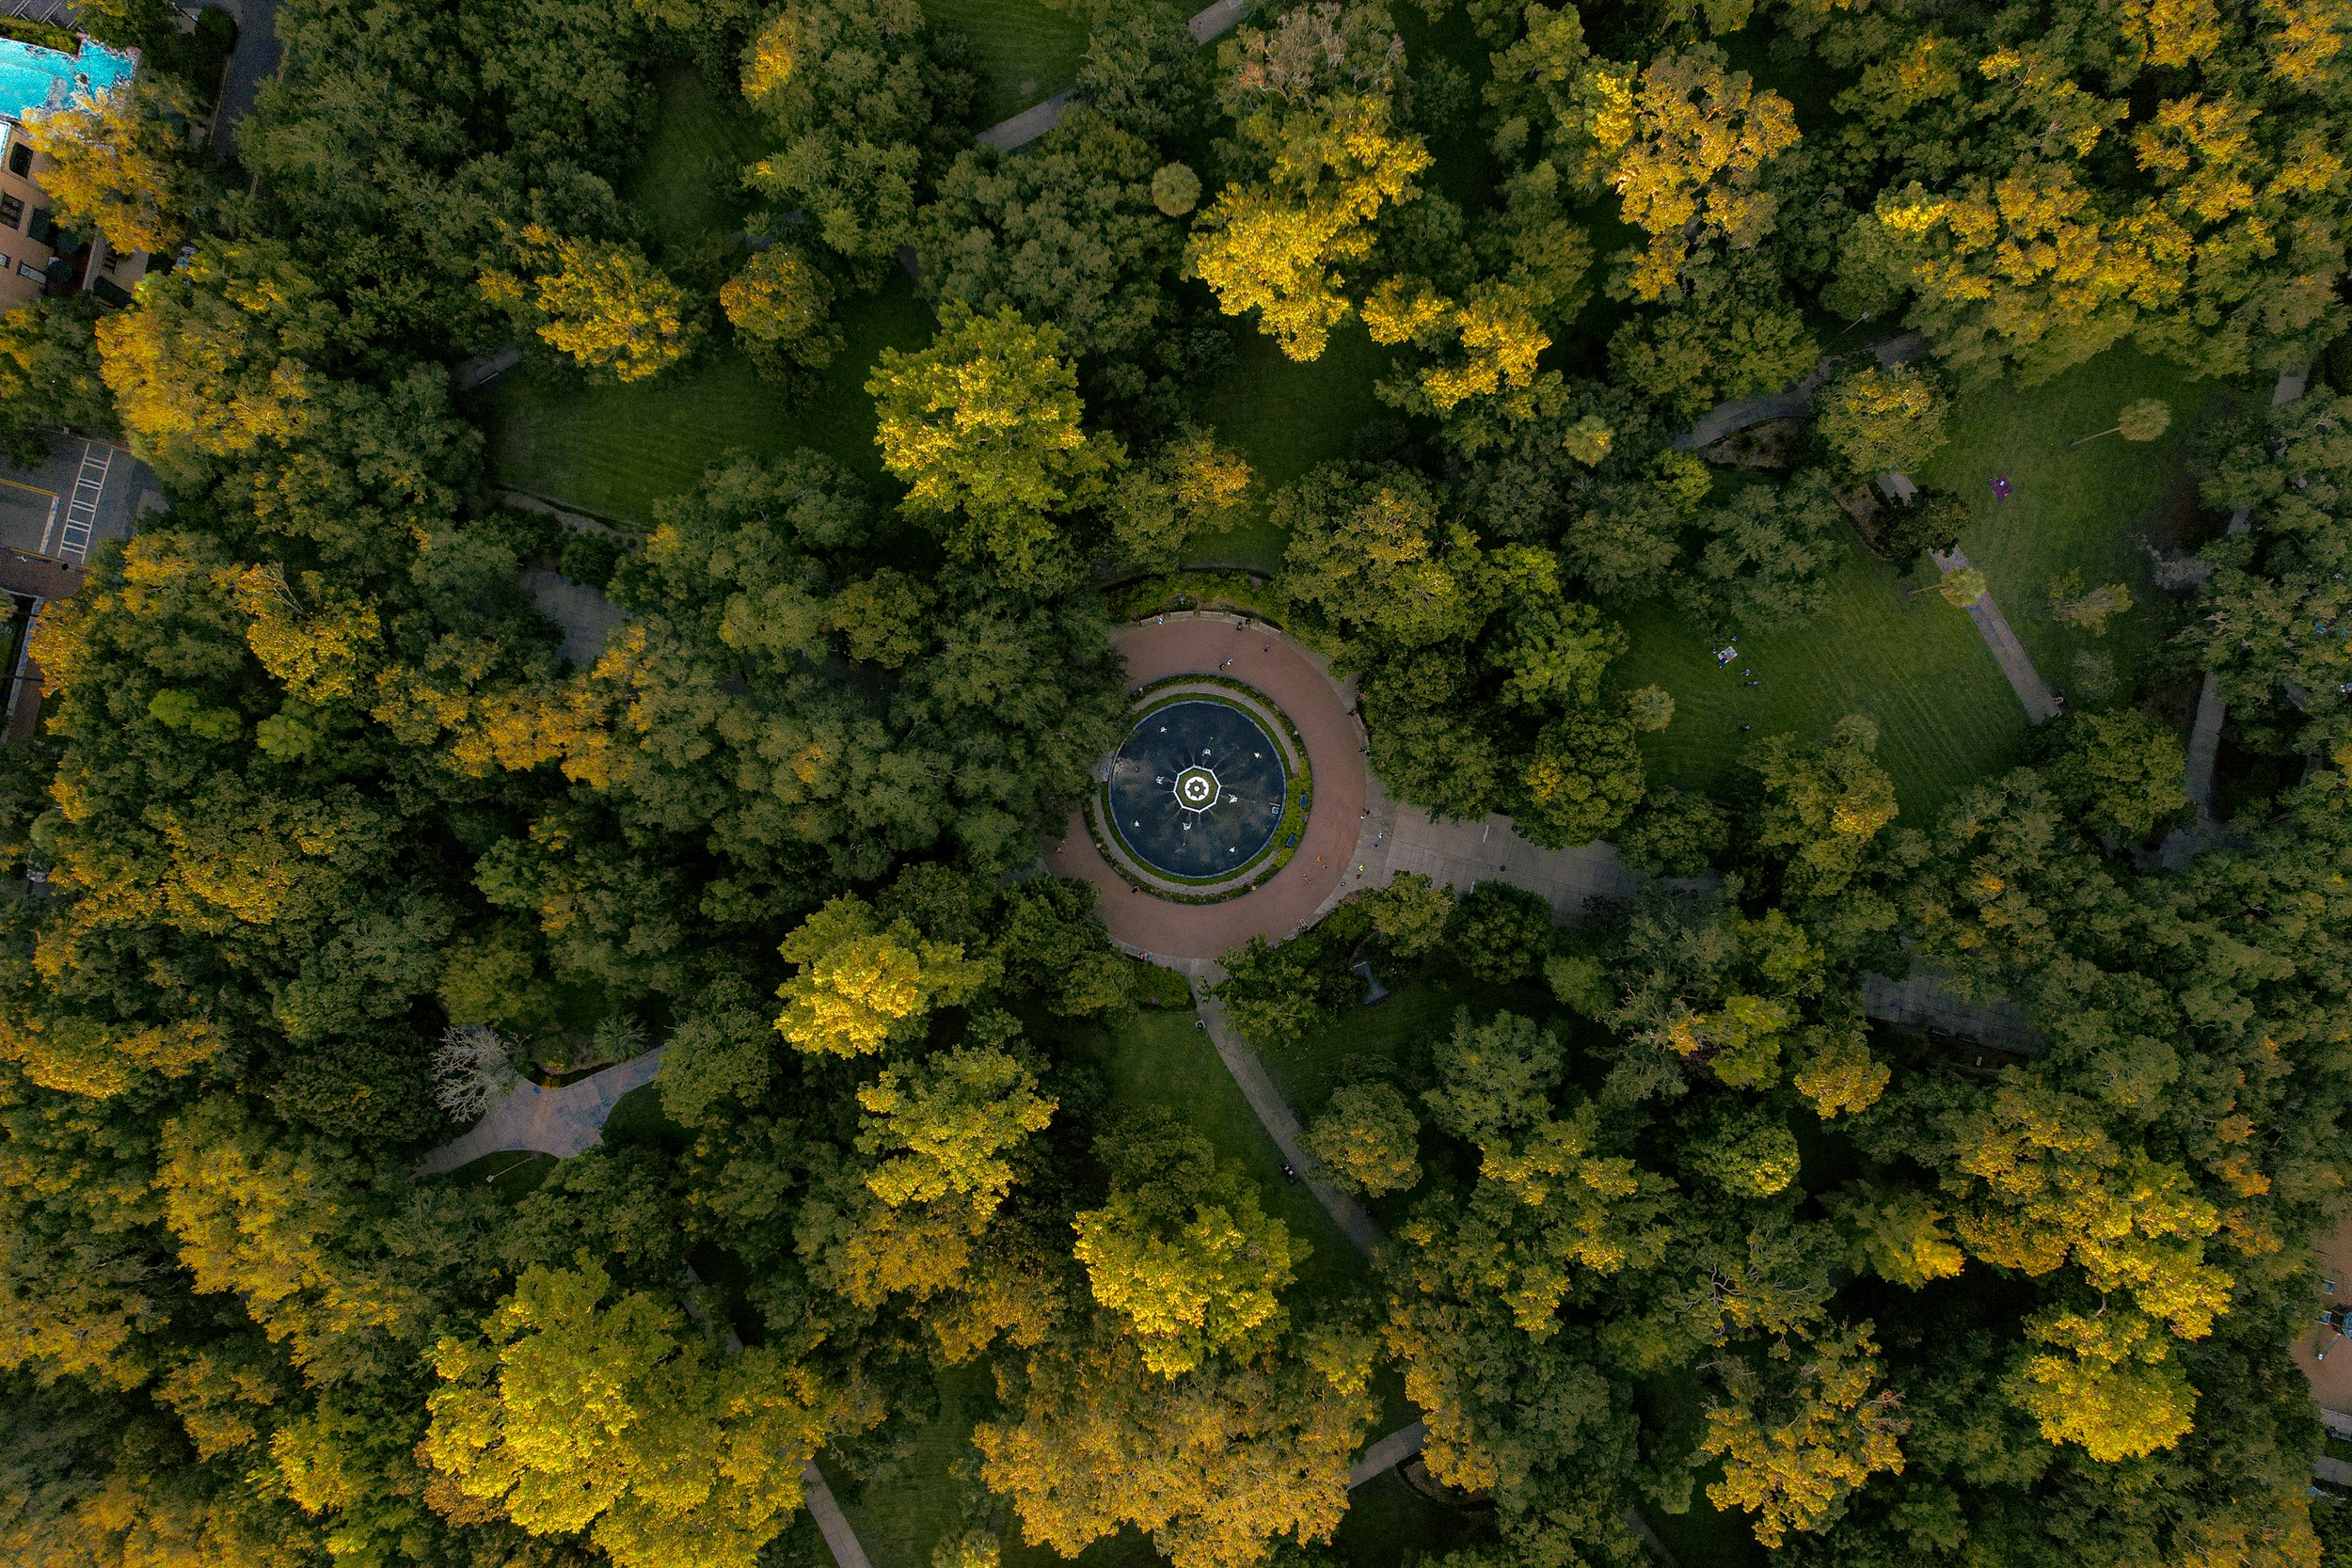
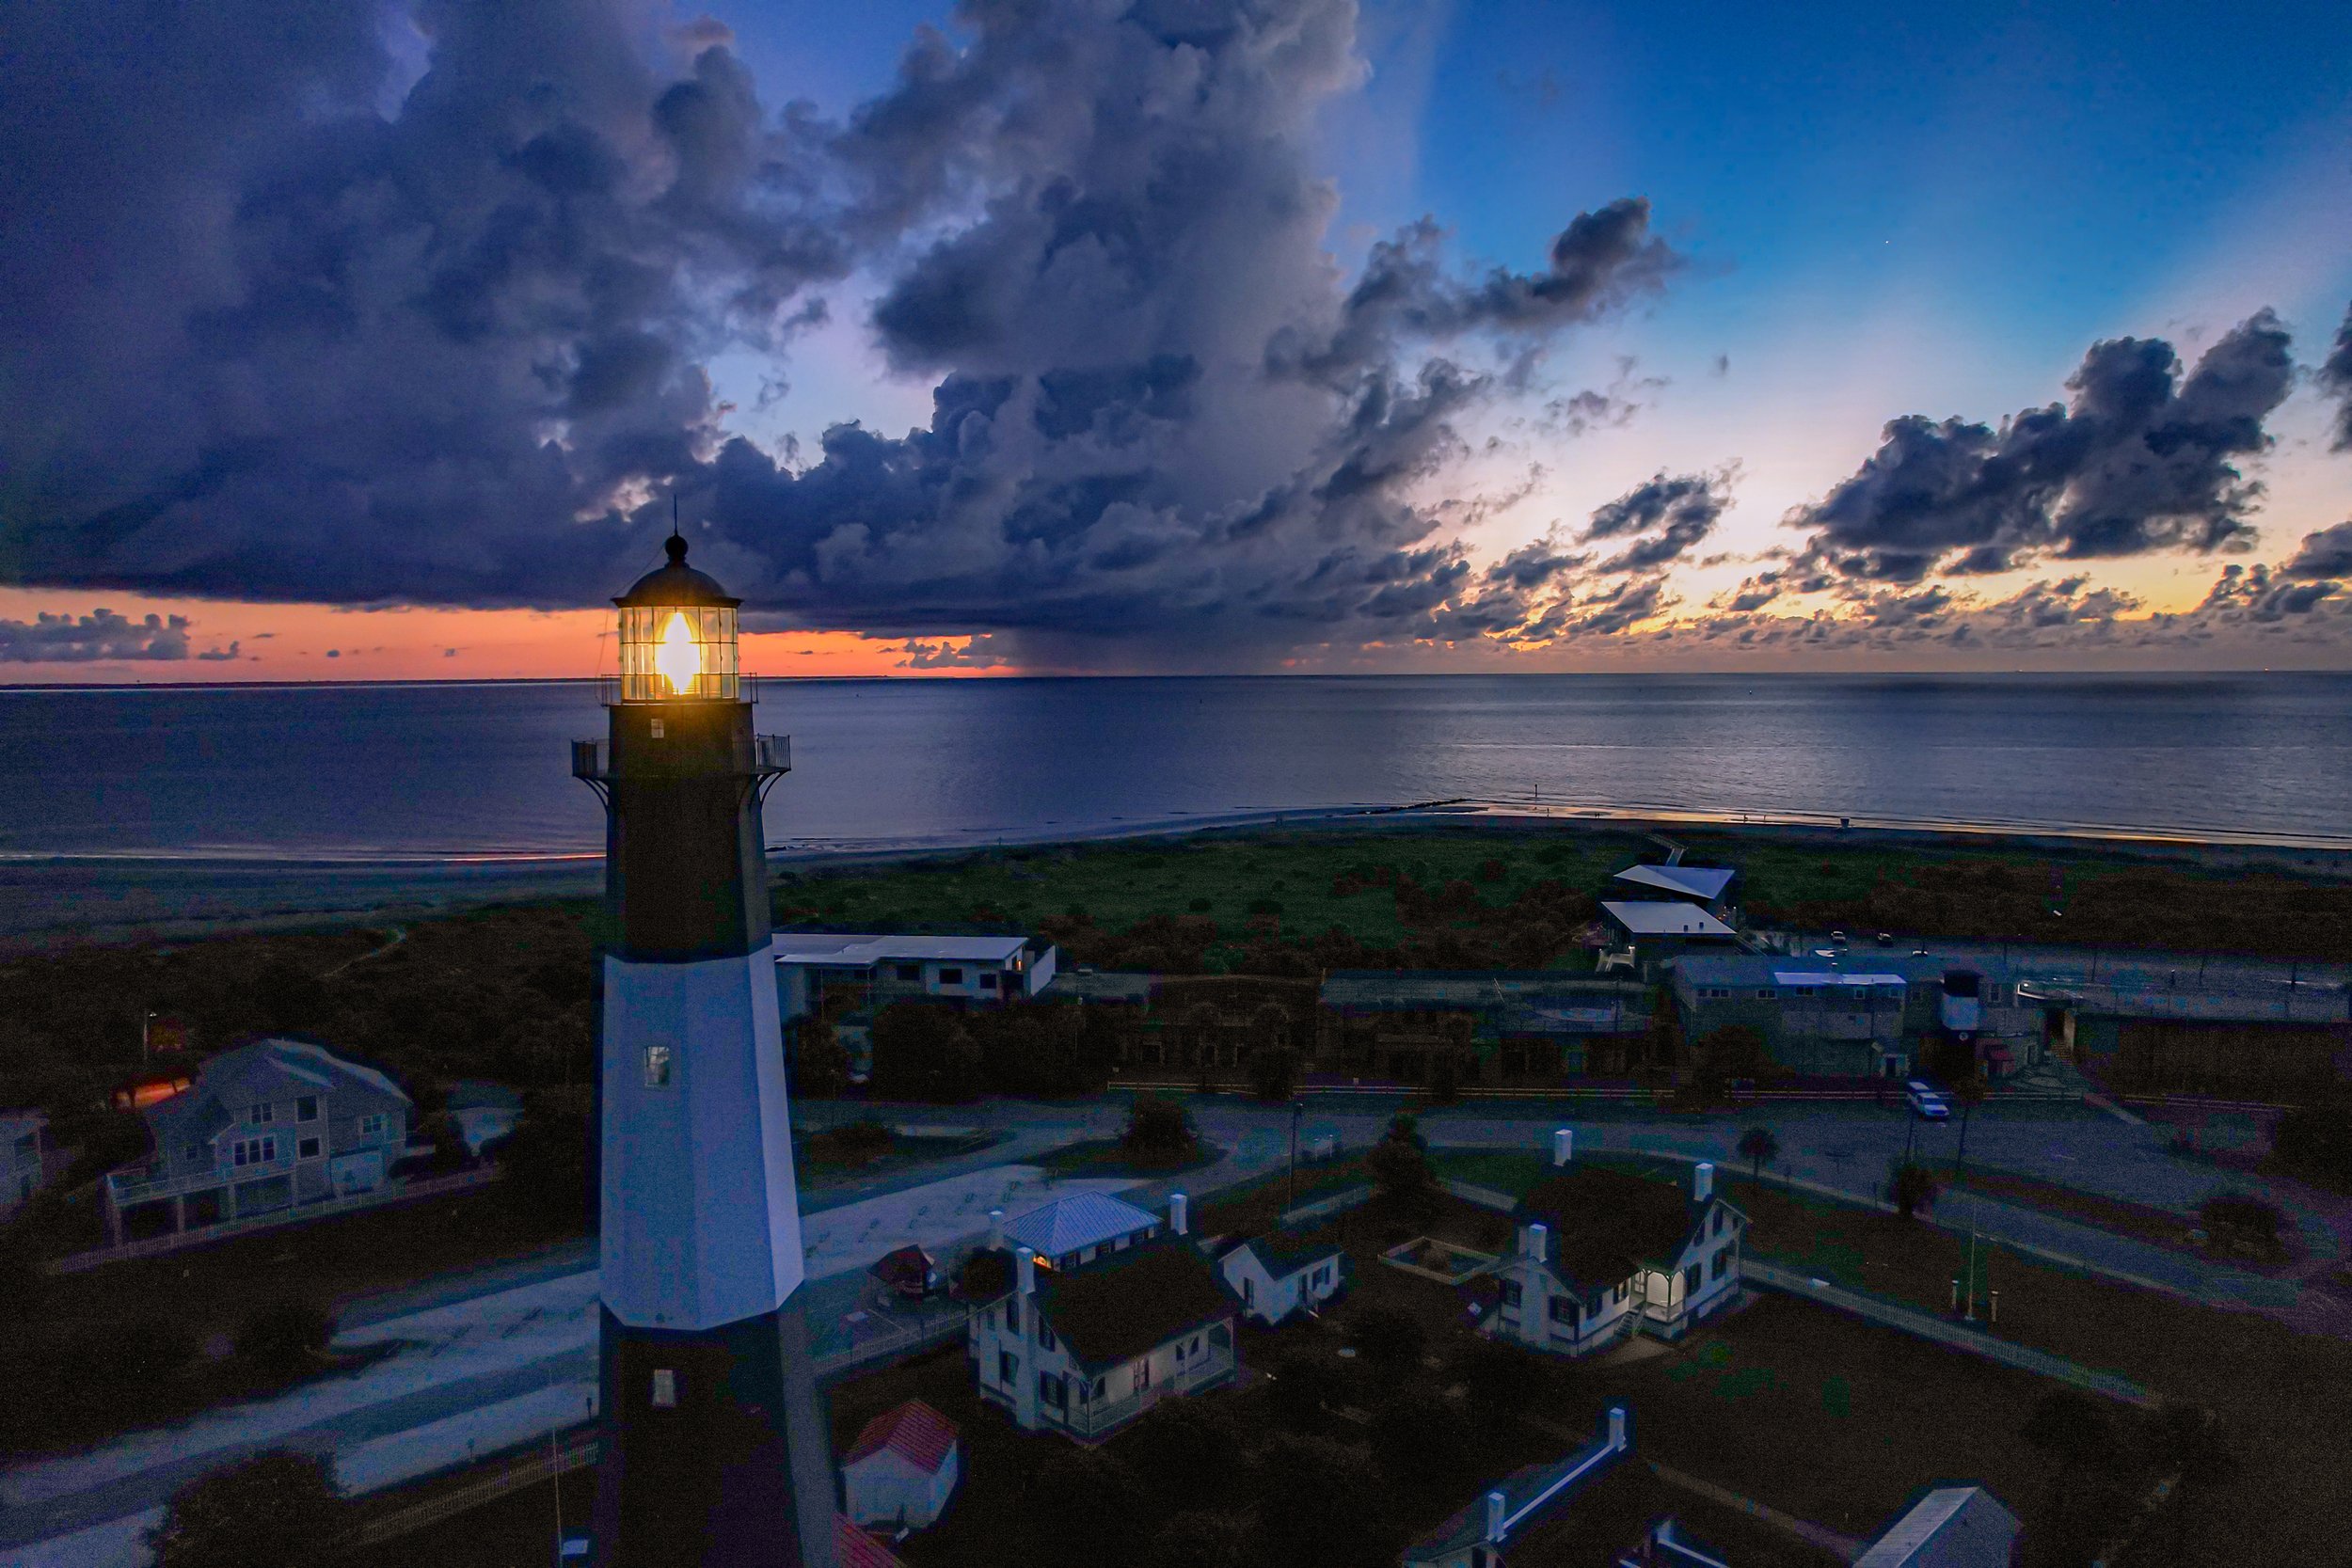
The DJI Air 2S was next. The drone allowed us to capture footage from perspectives we could only dream about (or pay massive amounts of money to utilize a helicopter or plane to get). It captures in 5.4k 30fps or 4k 60fps. It also has the ability to capture in a Dlog color profile to give more creative depth when color grading it afterwards. With a battery of 31 minutes, it allows me to fly around and capture everything I need without having to bring it down. The DJI Air 2S became a mainstay in our camera gear. We would bring that with us more often that the GoPro. With such a professional grade camera and with a 10 bit color depth, I wanted something else that would be able to give me the same if not more creative room when it came to color correction and bring out highlights and shadows in post-processing, which led to our next piece of equipment.
The Sony A7IV has single-handedly been the most universal tool for us in our travels since acquiring it, and we are still using it almost every day. The picture quality on the Air 2S was good, but it didn’t leave much room for cropping if the image wasn’t exactly the composition you wanted. This is where the A7IV comes in. It allows us to have a professional grade camera that can capture crisp images and cinematic quality footage to utilize for our pages. It has a 33mp sensor, and can capture 4k 60fps in 10 bit 4:2:2 S-log 3. That’s a really nerdy way to say, it captures a lot of detail in a scene. The possibilities of this camera are endless and we have yet to find ourselves wanting when it comes to anything else. I will detail the lenses I use down below.
Camera Lenses for the A7IV. When it came to lenses, I have found out that glass matters most in image quality, a good glass can even elevate a cheap camera. I knew we had to get some quality lenses to bring out the details of the spectacular landscapes. The first lens was one to capture it all. The Sony GM 24mm f1.4. As a wide angle lens, this was to help allow us to capture the vast landscapes in all of their glory. The second lens was for distant objects. The Sony GM OSS II 70-200 f2.8. It has been the best piece of glass for this camera. Every image this lens captures is so crisp and clear. The backgrounds are blurred into silky smooth perfection and the autofocus is amazing. The third lens was for everything in between. The Sigma DG DN Art 24-70mm f2.8 has proven to be a very versatile zoom lens. Most recent uses of it have been to shoot weddings and it did it exceptionally well, remaining on the camera almost the entire day. Are there more lenses I have on my wishlist? Of course, but that doesn’t mean they are necessarily required. If anything they would be to expand the reach and functionality of the camera even more.
After using the DJI Air 2s for 2 years, I decided that I needed a drone that would be cheaper to replace should anything happen to it, and I wanted something that also was a bit smaller without sacrificing much in terms of picture quality. DJI’s newest release of their mini series with the Mini 3 Pro knocked it out of the park, checking off all the boxes of what we were looking for. Also, the drone comes in at a measly 249g, keeping it under the weight requirement for registering the drone with the FAA here in the US. With slightly more flight time than the Air 2s, and even more flight time if you upgraded to an extended battery (however this puts you above the minimum weight requirement for the FAA and therefor requires registration) this was almost certainly an upgrade over the previous drone we had. I did purchase the Freewell ND Filters for the drone in order to give us some more creative freedom when it comes to video and stills, and it has certainly been well worth it.
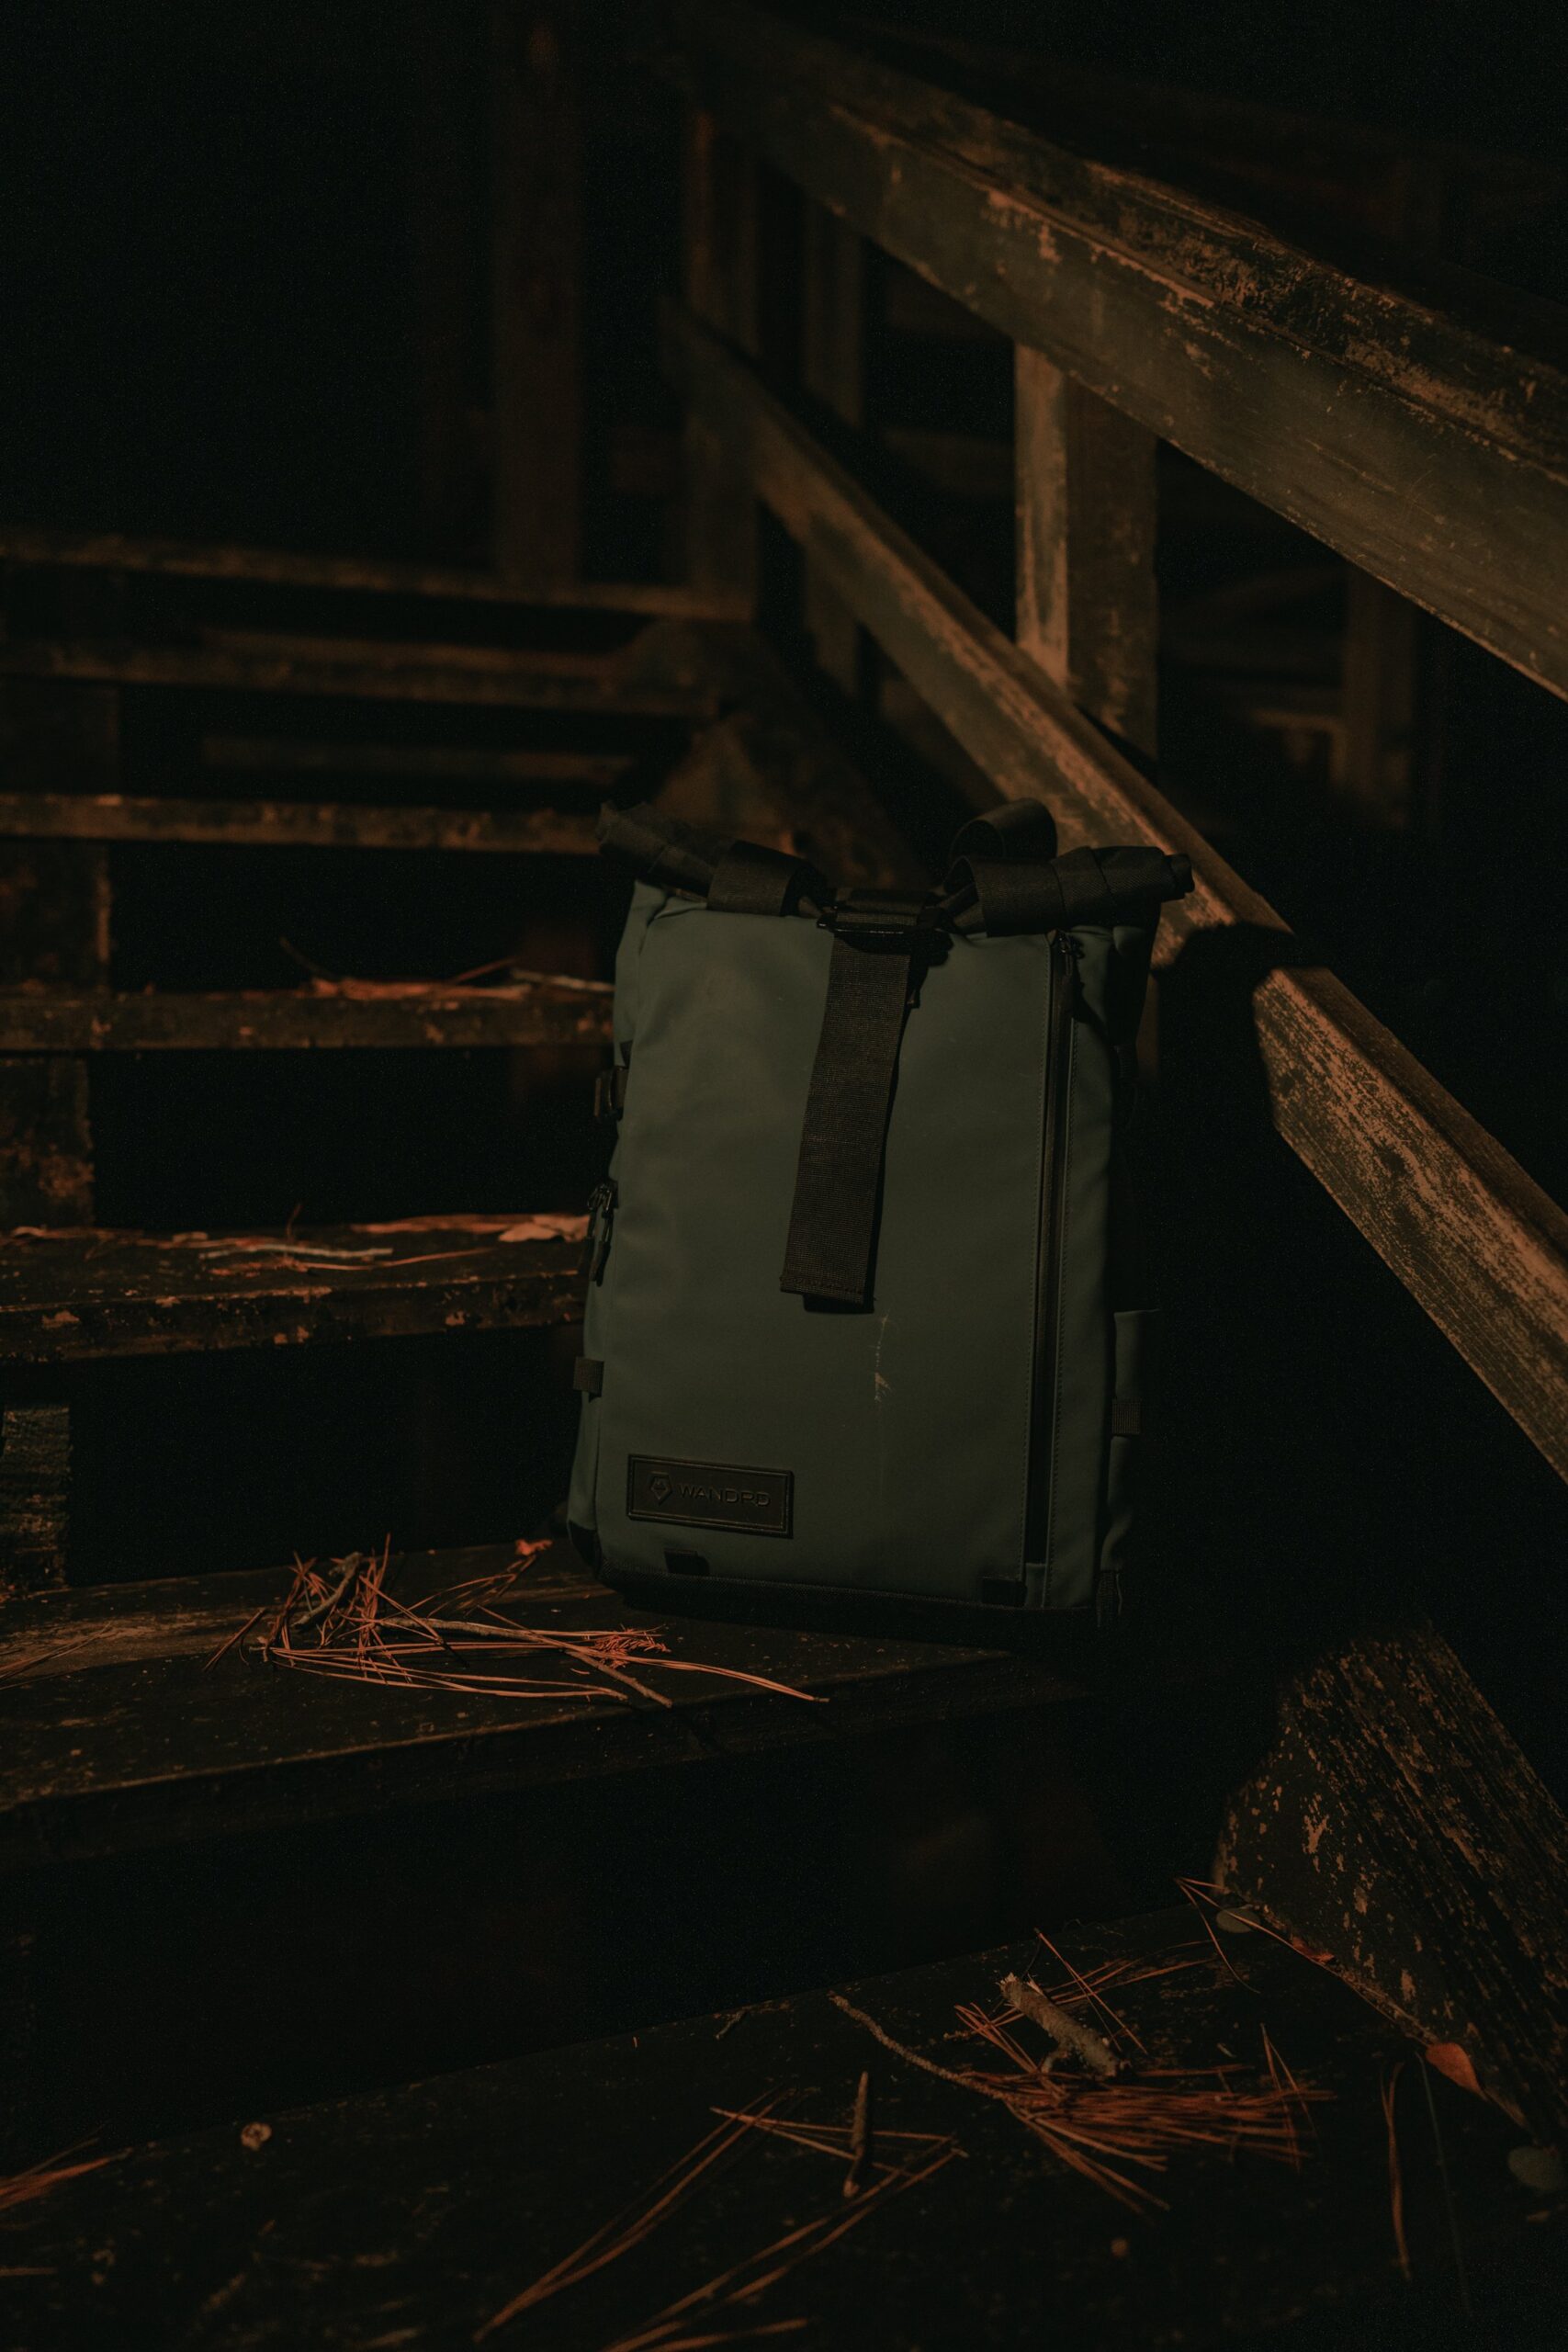
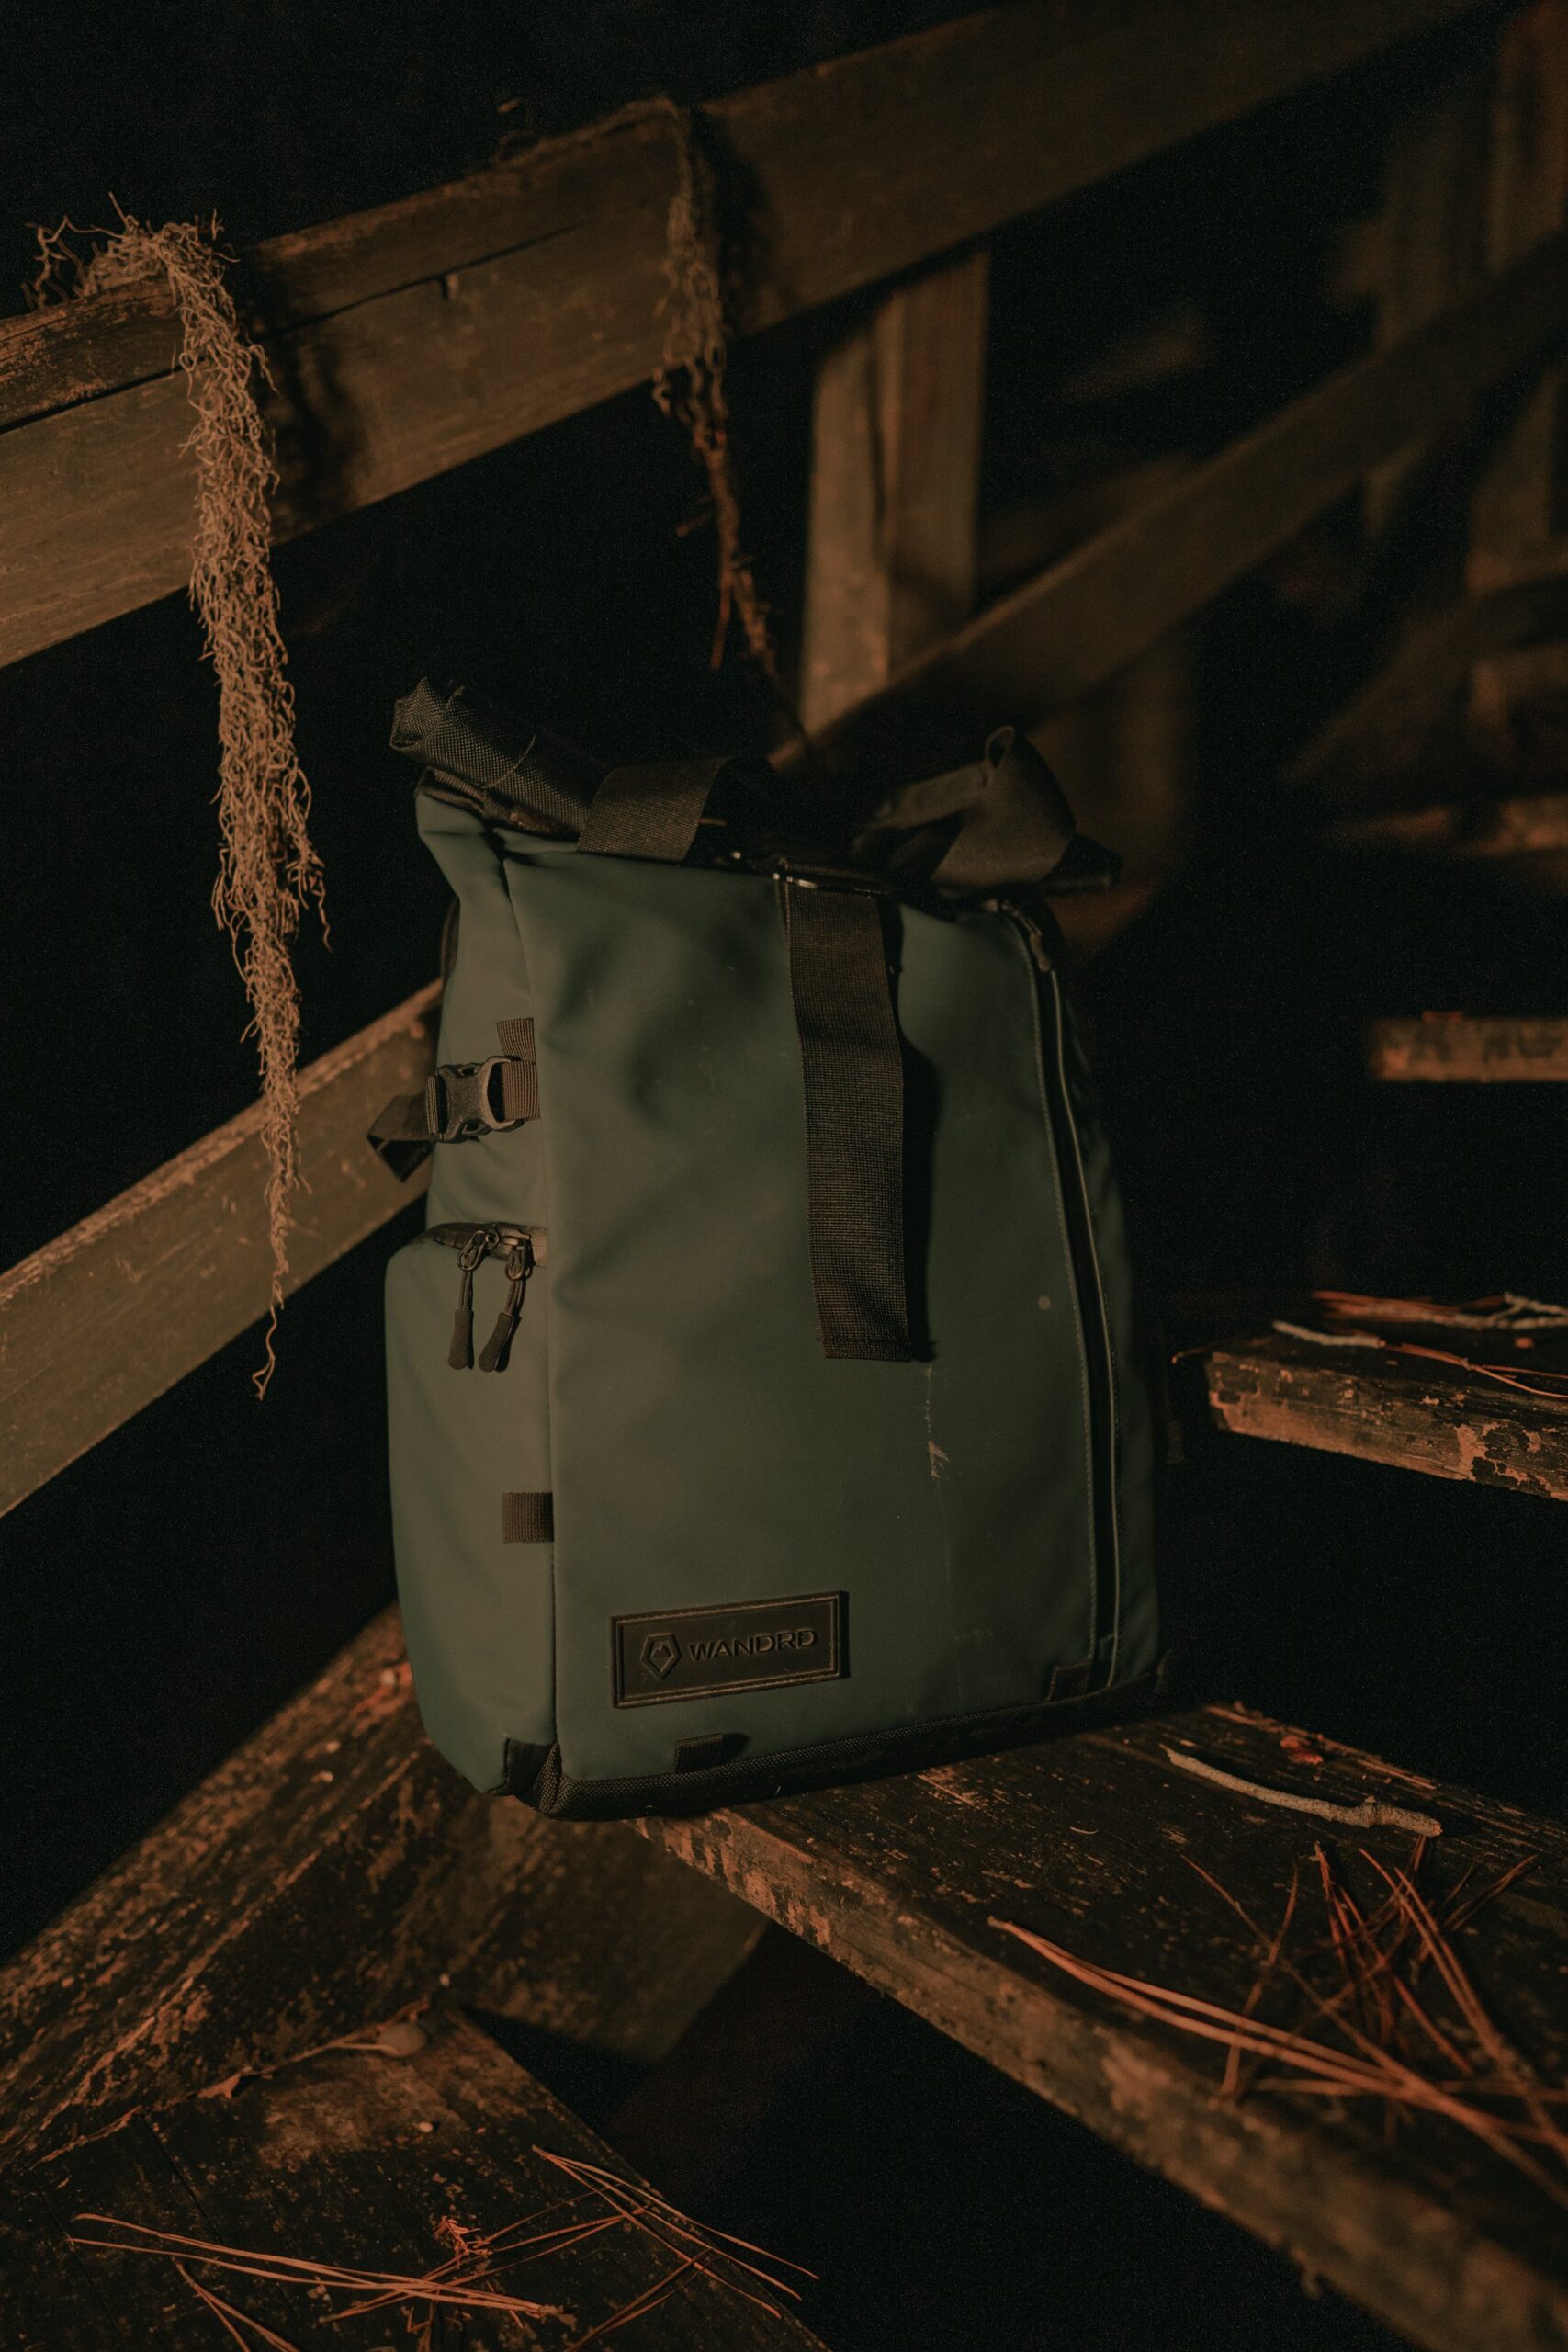
With all of the equipment we have accumulated, we needed a bag that would be able to help stash all this gear and carry it on long trips where we would be away from our home for multiple days. For that problem I looked to the WANDRD Prvke bag. It allows us to store all of our camera equipment in it, as well as lens hoods, chargers, filters, SSDs, iPad, and laptop. It is weather resistant and even has a tripod attachment slot on the side for our Manfrotto Befree Tripod.
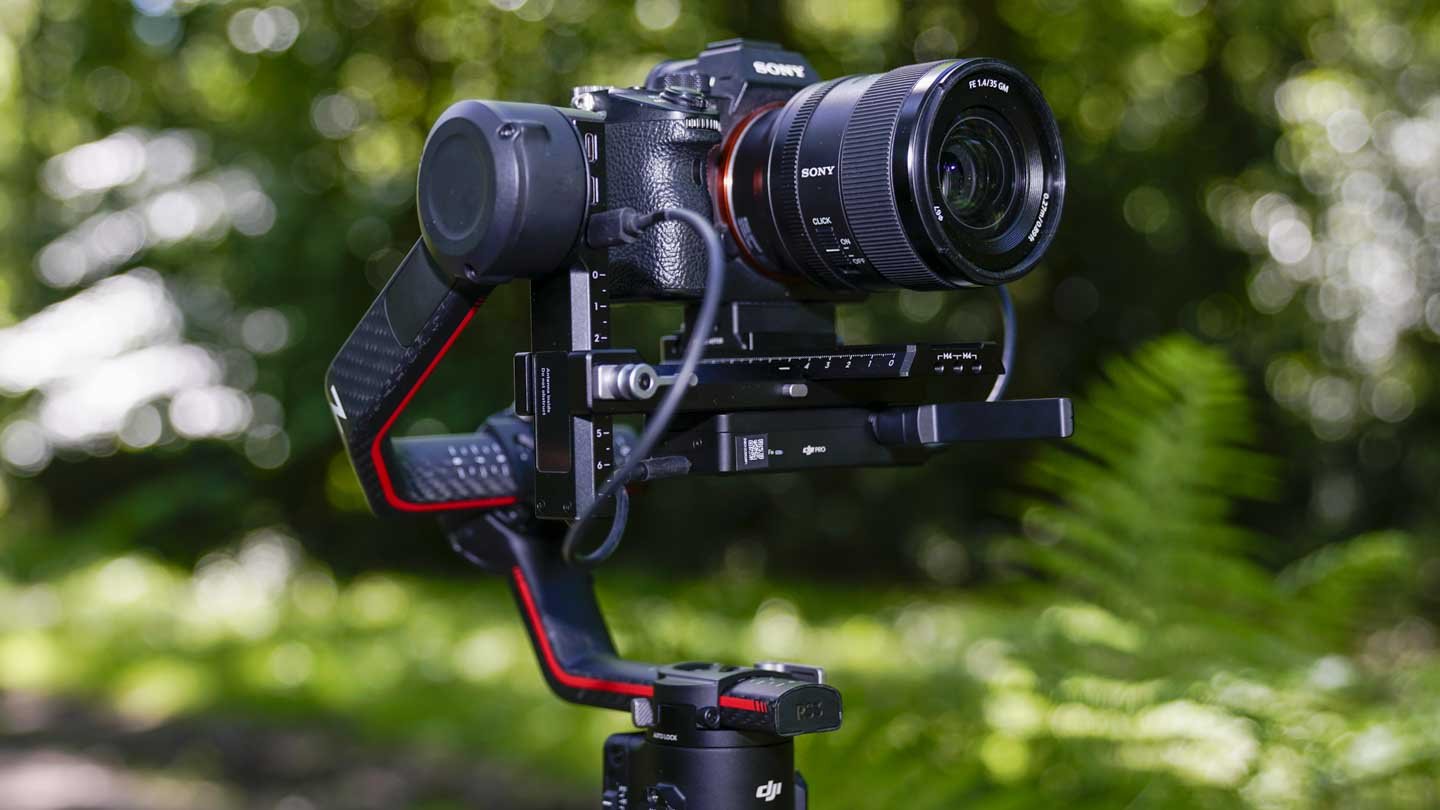
To finish off this list, we have our most recent addition in the form of a DJI RS3 Pro gimbal. This has allowed me to attach the Sony, and any of my lenses to it and get smooth video footage for use in making videos and content. It has magnetic axis locks and automatically will lock itself in a closed position when powered off. It also has scalability for future upgrades with film equipment, if we wanted to mount the camera to a bike, a car, or a rocket ship we could. All in all our gear list is quite extensive, but as compact as we want it to be. I don’t have to have suitcases of luggage dedicated to hauling it all around everywhere and we only take what we anticipate we will need. I’m sure there’s more to be added in the future and for when that happens, we will keep you updated.
Comments